Categories
Technology

Hello Centos 9 Stream

Lately Ubuntu has been driving me nuts on my one desktop. Every few weeks LivePatch makes changes to the system and it no longer boots. I’ve tried disabling updates and LivePatch, only to find the system non-bootable a few weeks later.

Hello to Centos 9 Stream (CS9). While I know Centos is not known as a desktop OS, at this point I want stability, at least with this one specific desktop. I have a laptop with Ubuntu 20.04 and (knock on wood) never had an issue with it. I knew going into CS9 I would be doing a lot of problem solving to get my desktop setup.

VirtualBox I use VirtualBox to run applications that are provided only in Windows or other OS’s. When I installed VirtualBox from the EPEL repository, I could see both v6.1 and v7.0. Both installations would fail to install. After a few hours researching the errors I found that the problem was a known issue and has a fix, it is just not been released into the repository yet. So I installed the latest stable test build, version 6.1.41.

Wayland Issues Next I went to create an Ubuntu 22.04 LTS VM. I found it frustrating that CS9 didn’t come with a lot of basic desktop applications. Even after installing the extra repositories, there were a ton of gaps. So for the short term I had the idea to create an Ubuntu VM for those apps until I could figure out how to install them dirctly in CS9. When I created the VM, the install would get about 75% complete and then just shutdown. At first I thought my desktop was going into hibernate or suspend. After several attempts with me finally taking the time to watch the full install, I realized that VirtualBox was being dumped. In /var/log/messages I found a reference to Wayland core dump and Wayland being restarted. A quick search revealed that Wayland is a display server protocol that is replacing X11, however Wayland has a lot of issues. A quick reboot and just before logging in, I could click on the configure button in the lower right hand of the screen and change the protocol back to X11. My next attempt to create the Ubuntu VM in VirtualBox completed with no issues.

GNOME Extensions Next I wanted to get the Centos UI to be more desktop friendly. GNOME Tweaks comes installed by default, so that helped. I then installed all of the GNOME Shell Extensions, “sudo yum install gnome-shell-extension*”, then rebooted. After an hour or so exploring the extensions, I ended up with the dash panel at the bottom of the screen, icons on the desktop and the top menu bar updated. So now the desktop is starting to look like a real place to get some work done.

Snap When I first started experimenting with Linux, back in the Fedora 5 days, a friend of mine said “yum is your new best friend”. Back then I think my responses was “Huh?” Well, yum is still a good friend, however Snap is quickly becoming my new BFF. After installing snap and the snap core, I found the apps that were missing from CS9. Things like Slack, Spotify, Kdenlive, Darktable, GIMP were all there.

So whats left to configure…. I need to setup the 2 printers and the photo scanner. I really like shotwell in Ubuntu for managing photos, I want to see if I can find it for CS9. I’ve got a dozen or so cron jobs that need to be setup.

Categories
Blog Technology

Configure Xwiki as Root Website

Once Xwiki is installed and running, the default URL is http://wiki.petersens.ws/xwiki. Which is ok and works, however I don’t like specifying the application after the website. If I typed http://wiki.petersens.ws, tomcat would display it’s default banner. Instead I really wanted Xwiki to come up.

To change this behavior I needed to make 2 changes. 1/ deploy Xwiki as ROOT in tomcat and 2/ tell Xwiki that the URL and web app doesn’t contain the /xwiki/ application.

To deploy the application as root within tomcat, I deleted tomcat/webapps/ROOT directory. I then renamed the extracted xwiki folder to ROOT and renamed the war file xwiki.war to ROOT.war.

To update xwiki I modified the xwiki.cfg file. The file is now located in tomcat/webapps/ROOT/WEB-INF directory. There were 2 variables that needed to be uncommented and updated as follows:

xwiki.home=http://wiki.petersens.ws/
xwiki.webapppath=

After that is was simply a matter of restarting tomcat with a systemctl restart tomcat.

Categories
Technology

Installing XWiki on Centos 7

With Confluence migrating to a full cloud solution and no longer supporting small user deployments, I’ve been pushed into looking at other solutions. In looking around, I liked the support surrounding Xwiki, plus I use Xwiki at work so there is familiarity to the syntax language.

To setup Xwiki, I needed to configure an RDMS and java servlet engine. Xwiki will work with a wide range of database engines and java servlet engines. For RDMS I chose mariadb and tomcat for the java servlet.

MariaDB Setup

First install the database engine:

yum install mariadb mariadb-server

Start the database and enable it on reboot:

systemctl start mariadb.service
systemctl enable mariadb.service

Log into the database.

mysql -u root

Create a database for the wiki:

create database xwiki default character set utf8;

Create a user for the application to use in accessing the database: (of course use a better password!)

create user 'wiki'@localhost identified by 'xwiki';

Grant this user access to the xwiki database:

grant all privileges on *.* to 'xwiki'@localhost indentified by 'xwiki';

You can double check the grants are correctly applied with:

show grants for 'xwiki'@localhost;

Java Setup

You need to make sure you select a java version that works with a specific version of tomcat and is supported by the Xwiki application. At the time of this writing, Java 8, Tomcat 8 and Xwiki 12.10.10 all work together.

Installing Java 8:

yum install java-1.8.0

Verify the install and version by running at the command line:

java -version

The response back should be similar to the following:

openjdk version "1.8.0_302"
OpenJDK Runtime Environment (build 1.8.0_302-b08)
OpenJDK 64-Bit Server VM (build 25.302-b08, mixed mode)

Open Firewall Port

Xwiki runs on port 8080/tcp and you’ll need to open the firewall port.

firewall-cmd --permanent --add-port 8080/tcp
firewall-cmd --reload

Tomcat Install

First thing to do is create a group and user for tomcat to run under:

sudo groupadd tomcat
sudo useradd  -g tomcat -d /opt/tomcat tomcat

The download tomcat 8 from tomcat.apache.org. Make sure you are downloading the version of tomcat you decided to run. Its easy to download an incorrect version which will drive you nuts later on. (ask me how I know) Also download the tar.gz version, as it preserves file attributes.

Upload Tomcat 8 to the /opt directory and uncompress it. gzip -d and tar -xf will get the job done. I then remove the /opt/tomcat directory and rename the /opt/apache-tomcat-8.5.72 directory to /opt/tomcat. I update the group and owner on the /opt/tomcat directory to make sure the tomcat user has full access to the servlet.

chgrp -R /opt/tomcat
chown -R /opt/tomcat

You should double check the file attributes in the /opt/tomcat/bin directory. All of the *.sh files should be set executable. If not run the following command:

chmod +x /opt/tomcat/bin

Create the Service Wrapper

Creating a service wrapper allows for systemctl to start / stop / restart the tomcat servlet. Create the file tomcat.service in the /etc/systemd/system/ directory. Copy and paste the following code:

[Unit]
Description=Apache Tomcat 8 Service
After=syslog.target network.target

[Service]
Type=forking

User=tomcat
Group=tomcat

Environment=JAVA_HOME=/usr/lib/jvm/jre
Environment=CATALINA_PID=/opt/tomcat/temp/tomcat.pid
Environment=CATALINA_HOME=/opt/tomcat
Environment=CATALINA_BASE=/opt/tomcat
Environment='CATALINA_OPTS=-Xms512M -Xmx1024M -XX:MaxPermSize=192m -server -XX:+UseParallelGC'
Environment='JAVA_OPTS=-Djava.awt.headless=true -Djava.security.egd=file:/dev/./urandom'

ExecStart=/opt/tomcat/bin/startup.sh
ExecStop=/bin/kill -15 $MAINPID

[Install]
WantedBy=multi-user.target

After saving the file, run the following commands to start the tomcat service:

systemctl daemon-reload
systemctl start tomcat.service

To have the tomcat service start on boot up remember to enable it:

systemctl enable tomcat.service

Configure Xwiki

Copy the xwiki-platform-distribution-war-13.8.war file to /opt/tomcat/webapps/xwiki.war. Restart the tomcat service.

systemctl restart tomcat.service

Copy the mariadb JDBC driver jar file into the Xwiki library folder. The folder should be /opt/tomcat/webapps/xwiki/WEB-INF/lib/. I found the mariadb driver their downloads page. I used the most current stable version, which at this writing is version 2.7.3,

Edit the hibernate.cfg.xml file that is located in xwiki/WEB-INF directory. This file provides the connection strings to the database we created earlier. Make sure to comment out the hsqldb section. By default Xwiki comes with this section enabled. I provided the section to comment out:

    <!--
    <property name="hibernate.connection.url">jdbc:hsqldb:file:${environment.permanentDirectory}/database/xwiki_db;shutdown=true</property>
    <property name="hibernate.connection.username">sa</property>
    <property name="hibernate.connection.password"></property>
    <property name="hibernate.connection.driver_class">org.hsqldb.jdbcDriver</property>

    <property name="hibernate.connection.charSet">UTF-8</property>
    <property name="hibernate.connection.useUnicode">true</property>
    <property name="hibernate.connection.characterEncoding">utf8</property>

    <mapping resource="xwiki.hbm.xml"/>
    <mapping resource="feeds.hbm.xml"/>
    <mapping resource="instance.hbm.xml"/>
    <mapping resource="notification-filter-preferences.hbm.xml"/>
    <mapping resource="mailsender.hbm.xml"/>
    -->

Then uncomment the mariadb section. Update the user name and password that your created when setting up the database.

    <!-- MariaDB configuration.
         Uncomment if you want to use MariaDB and comment out other database configurations.
         Notes:
           - if you want the main wiki database to be different than "xwiki"
             you will also have to set the property xwiki.db in xwiki.cfg file
    -->
    <property name="hibernate.connection.url">jdbc:mariadb://localhost/xwiki?useSSL=false</property>
    <property name="hibernate.connection.username">xwiki</property>
    <property name="hibernate.connection.password">xwiki</property>
    <property name="hibernate.connection.driver_class">org.mariadb.jdbc.Driver</property>
    <property name="hibernate.dbcp.poolPreparedStatements">true</property>
    <property name="hibernate.dbcp.maxOpenPreparedStatements">20</property>

    <property name="hibernate.connection.charSet">UTF-8</property>
    <property name="hibernate.connection.useUnicode">true</property>
    <property name="hibernate.connection.characterEncoding">utf8</property>

    <mapping resource="xwiki.hbm.xml"/>
    <mapping resource="feeds.hbm.xml"/>
    <mapping resource="instance.hbm.xml"/>
    <mapping resource="notification-filter-preferences.hbm.xml"/>
    <mapping resource="mailsender.hbm.xml"/>

Create Permanent Directory

Xwiki needs a directory for storing attachments and other files. You want these files to be out side of the Xwiki application area. I use /var/lib/xwiki/data for this storage. I then set the owner and group to the tomcat user/group.

chgrp -R tomcat xwiki
chown -R tomcat xwiki

In the /opt/tomcat/webapps/xwiki/WEB-INF directory modify the xwiki.properties file. uncomment the environment.permanentDirectory and make it point to the correct location you have chosen.

Your Ready to Access Xwiki!

XWiki runs on port 8080. To access your XWiki installation open your web browser and type: http://yourdomain_or_ip_address:8080/xwiki

The first time launching Xwiki., the setup script will run. The tables in the database will be created and you’ll setup amoungst other things, the administrator id and password.

Categories
Blog Technology

#@$%!!

One of my boxes got hacked.  Ugh.  Fortunately it was a jump server that had no data.

I have 2 servers exposed to the Internet, a jump server and a reverse proxy.  The reverse proxy provides access to the web applications that I run.  The jump server I use for SSH access into my network from remote locations.

They never got full root access to the box, they didn’t modify the firewall configs and no additional processes were spawned.  What they did do was mess up the logging facility.

After rebuilding the box from scratch I’ve made authentication to be public key only.  I’m thinking of implementing a port knocking feature so that the pot does show up on a port scan.

Categories
Technology

Hard Drive Bites the Dust

On Thursday, March 26th, the 1.5Tb hard drive in my primary development box bit the dust.  Based on the diagnostics and sounds emanating from the drive, I believe I had a head crash. My first thought was “Oh no, when was the last time I backed up the data”. After a mad scramble I realized I could recover everything up to a point 2 weeks prior to the crash. Not bad. Could have been much worse.

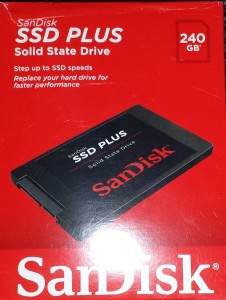
My second thought was “Ok now what do I do with the machine?”. The machine is a few years old, but still has a lot of life left in it. It has an AMD 6-way processor with 16Gb of ram. I have been toying with the idea of using a SSD drive to speed up the machine. Just could never bring myself to take the plunge and rebuild the box from scratch.sandisk_ssd

I decided to purchase a 256Gb Sandisk SSD drive and a traditional 3Tb Seagate Hard Drive.

On my dev box I like to run Linux. Usually its one of the Fedora versions. Rebuilding the box, I decided to go with Centos 7.0 distro. The production websites that I have running are all on Centos 6.5 and it was time to start solifying on a common distro.

After researching the best partitioning method for SSD drives, I ended up putting the “/” and “/boot” partitions on the SSD. The “/swap” and “/home” partitions went on the Seagate drive.

Obviously I don’t have a way to benchmark the performance improvements with this set-up, however anecdotally, I do notice applications are very quick to start up and respond. Interestingly when I retrieve data from the network, there is very noticeable delay in getting the data. That is with a 1gb nic. With the old setup I couldn’t really differentiate between the application start up delays and the network delays.

Overall I very happy with the end result. If you have a box that is “mid-life”, installing a SSD drive can definitely improve the performance. Also this has reinforced the requirement to backup regularly.

Categories
Family Technology

Lost and Found My Phone

Samsung S4

Last night I discovered my phone was missing.  I knew I had it on the bus coming home.  In the house I realized it was not in the holster.  After searching the car I figured it was somewhere on the bus.

Cathy called the bus line to find out the bus was heading back to NYC for another run.  We thought that if I was lucky I might get the phone back in a couple for days.

I use Sprint’s family locator app to track the where abouts of MJ and Jill.  Actually I track their phones and because they would never separate from the phones, I can reliable find them.  The family locator app sends periodic messages to all the phones that I have tracking turned on, so Cathy and the kids all know that I can track them.

After getting off the phone with the bus line, Cathy turned to me and asked if I could track the phone with that software.  I had MJ install the family locator software on his phone and configure it to track mine.  We then spent the next 2 hours watching my phone travel up the turnpike, into the Port authority bus terminal and back down the turnpike.  We quickly called the bus line to find out the route the bus was taking and the stops.  Turned out the last stop was in our home town, Lincroft.

As we watched the bus travel, MJ and I drove over to the bus stop.  We had to wait only 5 minutes for the bus to arrive.  The bus line sent a text to the driver that someone lost their phone on the bus.  As I approached the bus, he was fully aware of  why I was there.  The phone was resting nicely between the wall of the bus and the seat.

The only downside was that before we started tracking the phone, I had started to look at the new Samsung S5.  Guess now I’ll have to wait a year before I upgrade to that phone.

Categories
Technology

Virtual Box

I’ve had hit-or-miss experiences with virtual OS’s on my home machine.  When I had an Apple powerbook, Parallels was awesome.  It just simply worked with no hassles.

On the Linux platform I have not been impressed with any of the virtualization packages until just a few days ago.  A colleague showed my Oracle’s Virtual Box software.   Just like Parallels, it just works on Linux.  No hassle, no fuss, no issues.

So far on my Fedora 17 desktop I have Windows 7 and CentOS 6.5 running.  By this evening Fedora 20 will be running as well.


Categories
Rails Technology

Ruby on Rails and SQLite3

After upgrading to Fedora 17, I had to re-install Ruby on Rails.  I’m using Rails 3.2.7 with the news updates.  In the past I’ve always use MySQL server as the database, so I’ve always installed the database, drivers and associated gems.  Usually it takes an hour or two to get everything setup and working correctly.

Today I had the need to use SQLite.  The app I’m writing needs to have the data files local.  SQLite is the default database for Ruby on Rails, so I figured it would be no issue.  Wrong.

With installing rails, I installed all the Gems, not thinking that I was logged in as root.  Apparently the SQLite3 gem does not update the GEM_HOME environment variable correctly when you are logged in as root.

After many hours of frustration I came across a note where someone else resolved the error by uninstalling the SQLite Gem, making sure all remnants of the gem were gone and then re-installing it.  By “making sure all remnants…were gone”, I mean I had to make sure the sqlite3 gem no longer appeared when I ran the “gem list –local command”.  Since I had installed somethings as root and some as myself, I had to run the gem uninstall as different users until I had gotten rid of it.

The error I was receiving occurred while I tried to perform a rake db:migrate.  I received the error “cannot load file — sqlite3/sqlite3_native”.

After finally clearing out the sqlite3 gem, I made sure I was logged in as myself and re-installed the gem.  After re-installing the gem as myself, the GEM_HOME environment variable was updated correctly and “rake db:migrate” created my development database!

Categories
Technology

Installing Citrix 12.1 on Fedora 17

Instructions for installing Citrix Receiver 12.1 on a 32-bit system running Fedora 17 with the Gnome desktop.

The install was completed in essentially 5 steps:

  1. Install FFmpeg libraries from RPMFusion
  2. Install the Citrix Receiver 12.1 RPM
  3. Create & install a local policy for SELinux
  4. Export & Install the SSL Certificates
  5. Update the local policy for SELinux

While this is simple enough, finding the directories and reading through the log files can be tedious.  Below I’ve tried to capture the details for each of the steps I went through to enable the client to run.

The Citrix Receiver 12.1 needs FFmpeg libraries to run properly.  FFmpeg is available from RPMFusion. The RPM package I installed was the free repository for Fedora 15, 16 and 17.  This link will pull the RPM directly from RPMFusion.

After enabling the RPM Fusion repository, you need to install FFmpeg.

Then I pulled the Citrix Receiver 12.1 RPM and installed it.  This link will take you to Citrix’s Linux download page.

When I ran the Citrix Receiver, I got a file not found error message for $HOME/.ICAClient/All_Regions.ini.

The Citrix receiver is installed in /opt/Citrix/ICAClient.  I found the missing files in /opt/Citrix/ICAClient/config.  I copied all the files in this directory to $HOME/.ICAClient.

Three of the files in the config directory are links.  The symbolic links are relative, so copying the links to your home directory is useless.  The three files are: appsrv.ini, module.ini, wfclient.ini.  These three files are located in /opt/Citrix/ICAClient/nls/en directory.  I copied these three files into my $HOME/.ICAClient directory.

When I ran the Citrix Receiver, I was given some SELinux errors.  The Citrix Receiver, which has an application name of wfica, needs access to several files.  To clear up the SELinux issues I had to run the following 2 commands several times until all the files that wfica needed access to were added to my local policy file.

SELinux Commands to create a local policy:

# grep wfica /var/log/audit/audit.log | audit2allow -M mypol
# semodule -i mypol.pp

The semodule command appends your local policy file to the kernel module.  You need to run semodule as root and after running it, your local policy changes are incorporated into the kernel.  This means the changes will remain available after rebooting.

After a few iterations, the Citrix receiver would start up, but I would get an error on a SSL certificate.  The certificate involved was from Entrust.net.  To resolve this I needed to export the certificates from Mozilla and copy them in the keystore for Citrix.  To do this I, in Mozilla I went to edit / preferences / advanced / view certificates. I then scrolled down and found the certificate that was giving me the error.  Under Entrust.net, there are three certs. I selected all three and exported them.  Then from the directory I exported them to, I copied them to /opt/Citrix/ICAClient/keystore/cacert.

The Citrix Receiver started up, however there appeared to be some delays.  There appeared to be another file that Citrix needed access to, so I re-ran the two SELinux policy commands one more time to make sure I had enabled access for all the files.

The Citrix Receiver is running stable and I’ve had no other issues after following this recipe.

Hopefully this helps other.


Categories
Family Home Technology

Reprogramming the Comcast Remote

Universal Remotes

Comcast swapped out my cable box to resolve an intermittent problem that has been occurring the past few weeks.  They gave us a Cisco/Scientific Atlanta box.  The universal remote that came with the cable box was platinum colored. The universal remotes that came with the old box were silver colored.

I wanted the old remote to work with the new box so I have a fair chance of finding a remote in the house when I wanted to watch the TV.  It was easy to find instructions to program the remote to work with the TV and Stereo.  It was a bit more difficult to find out how to change the cable box.  The key was to unlock the remote.  After the remote was unlocked it was just a matter of finding the right 5-digit code.

I also wanted to change the default mode for volume control.  The remote uses the TV for the default volume control.  To change it I had to first perform a global volume unlock and then lock the default volume control to the right device.  In this case I wanted my stereo that was programmed under the Aux button to control the volume.

I’ve documented the steps and codes below to hopefully help someone else with a similar issue as well as document the steps for my future use.


To unlock / lock the remote:

  1. Press cable button
  2. Hold the Setup button until the cable button blinks twice
  3. Press 982
  4. The cable button will blink 4 times if unlocked.
  5. The cable button will blink 2 times if the remote locked.


To Program the Silver Remote to work with Cisco RNG cable Box:

  1. After unlocking the remote
  2. Press the cable button
  3. Hold the setup button until it blinks twice
  4. Enter a 5 digit code
  5. cable button will blink twice if the code is valid
  6. cable button will blink one long blink if the code is not valid
  7. Press the power button to test the code entered


Codes for the Silver Remote & Cisco RNG Cable Box:

  • 01877
  • 00877
  • 00477
  • 00008
  • 00237
  • 01982  <- This one worked for me


 Global Volume Unlock

  1. Hold Setup until the mode light blinks twice
  2. Press 993
  3. Press Vol+
  4. The mode light will blink 4 times confirming unlock


Restoring Global Volume Lock

  1. Press the mode that you want the global volume lock enabled on
  2. Hold the setup button until the mode light blinks twice
  3. Press 993
  4. Press the mode key
  5. The mode key will blink twice confirming global lock enabled
WP2Social Auto Publish Powered By : XYZScripts.com