Categories
Technology

Hello Centos 9 Stream

Lately Ubuntu has been driving me nuts on my one desktop. Every few weeks LivePatch makes changes to the system and it no longer boots. I’ve tried disabling updates and LivePatch, only to find the system non-bootable a few weeks later.

Hello to Centos 9 Stream (CS9). While I know Centos is not known as a desktop OS, at this point I want stability, at least with this one specific desktop. I have a laptop with Ubuntu 20.04 and (knock on wood) never had an issue with it. I knew going into CS9 I would be doing a lot of problem solving to get my desktop setup.

VirtualBox I use VirtualBox to run applications that are provided only in Windows or other OS’s. When I installed VirtualBox from the EPEL repository, I could see both v6.1 and v7.0. Both installations would fail to install. After a few hours researching the errors I found that the problem was a known issue and has a fix, it is just not been released into the repository yet. So I installed the latest stable test build, version 6.1.41.

Wayland Issues Next I went to create an Ubuntu 22.04 LTS VM. I found it frustrating that CS9 didn’t come with a lot of basic desktop applications. Even after installing the extra repositories, there were a ton of gaps. So for the short term I had the idea to create an Ubuntu VM for those apps until I could figure out how to install them dirctly in CS9. When I created the VM, the install would get about 75% complete and then just shutdown. At first I thought my desktop was going into hibernate or suspend. After several attempts with me finally taking the time to watch the full install, I realized that VirtualBox was being dumped. In /var/log/messages I found a reference to Wayland core dump and Wayland being restarted. A quick search revealed that Wayland is a display server protocol that is replacing X11, however Wayland has a lot of issues. A quick reboot and just before logging in, I could click on the configure button in the lower right hand of the screen and change the protocol back to X11. My next attempt to create the Ubuntu VM in VirtualBox completed with no issues.

GNOME Extensions Next I wanted to get the Centos UI to be more desktop friendly. GNOME Tweaks comes installed by default, so that helped. I then installed all of the GNOME Shell Extensions, “sudo yum install gnome-shell-extension*”, then rebooted. After an hour or so exploring the extensions, I ended up with the dash panel at the bottom of the screen, icons on the desktop and the top menu bar updated. So now the desktop is starting to look like a real place to get some work done.

Snap When I first started experimenting with Linux, back in the Fedora 5 days, a friend of mine said “yum is your new best friend”. Back then I think my responses was “Huh?” Well, yum is still a good friend, however Snap is quickly becoming my new BFF. After installing snap and the snap core, I found the apps that were missing from CS9. Things like Slack, Spotify, Kdenlive, Darktable, GIMP were all there.

So whats left to configure…. I need to setup the 2 printers and the photo scanner. I really like shotwell in Ubuntu for managing photos, I want to see if I can find it for CS9. I’ve got a dozen or so cron jobs that need to be setup.

Categories
Blog Technology

Configure Xwiki as Root Website

Once Xwiki is installed and running, the default URL is http://wiki.petersens.ws/xwiki. Which is ok and works, however I don’t like specifying the application after the website. If I typed http://wiki.petersens.ws, tomcat would display it’s default banner. Instead I really wanted Xwiki to come up.

To change this behavior I needed to make 2 changes. 1/ deploy Xwiki as ROOT in tomcat and 2/ tell Xwiki that the URL and web app doesn’t contain the /xwiki/ application.

To deploy the application as root within tomcat, I deleted tomcat/webapps/ROOT directory. I then renamed the extracted xwiki folder to ROOT and renamed the war file xwiki.war to ROOT.war.

To update xwiki I modified the xwiki.cfg file. The file is now located in tomcat/webapps/ROOT/WEB-INF directory. There were 2 variables that needed to be uncommented and updated as follows:

xwiki.home=http://wiki.petersens.ws/
xwiki.webapppath=

After that is was simply a matter of restarting tomcat with a systemctl restart tomcat.

Categories
Technology

Installing XWiki on Centos 7

With Confluence migrating to a full cloud solution and no longer supporting small user deployments, I’ve been pushed into looking at other solutions. In looking around, I liked the support surrounding Xwiki, plus I use Xwiki at work so there is familiarity to the syntax language.

To setup Xwiki, I needed to configure an RDMS and java servlet engine. Xwiki will work with a wide range of database engines and java servlet engines. For RDMS I chose mariadb and tomcat for the java servlet.

MariaDB Setup

First install the database engine:

yum install mariadb mariadb-server

Start the database and enable it on reboot:

systemctl start mariadb.service
systemctl enable mariadb.service

Log into the database.

mysql -u root

Create a database for the wiki:

create database xwiki default character set utf8;

Create a user for the application to use in accessing the database: (of course use a better password!)

create user 'wiki'@localhost identified by 'xwiki';

Grant this user access to the xwiki database:

grant all privileges on *.* to 'xwiki'@localhost indentified by 'xwiki';

You can double check the grants are correctly applied with:

show grants for 'xwiki'@localhost;

Java Setup

You need to make sure you select a java version that works with a specific version of tomcat and is supported by the Xwiki application. At the time of this writing, Java 8, Tomcat 8 and Xwiki 12.10.10 all work together.

Installing Java 8:

yum install java-1.8.0

Verify the install and version by running at the command line:

java -version

The response back should be similar to the following:

openjdk version "1.8.0_302"
OpenJDK Runtime Environment (build 1.8.0_302-b08)
OpenJDK 64-Bit Server VM (build 25.302-b08, mixed mode)

Open Firewall Port

Xwiki runs on port 8080/tcp and you’ll need to open the firewall port.

firewall-cmd --permanent --add-port 8080/tcp
firewall-cmd --reload

Tomcat Install

First thing to do is create a group and user for tomcat to run under:

sudo groupadd tomcat
sudo useradd  -g tomcat -d /opt/tomcat tomcat

The download tomcat 8 from tomcat.apache.org. Make sure you are downloading the version of tomcat you decided to run. Its easy to download an incorrect version which will drive you nuts later on. (ask me how I know) Also download the tar.gz version, as it preserves file attributes.

Upload Tomcat 8 to the /opt directory and uncompress it. gzip -d and tar -xf will get the job done. I then remove the /opt/tomcat directory and rename the /opt/apache-tomcat-8.5.72 directory to /opt/tomcat. I update the group and owner on the /opt/tomcat directory to make sure the tomcat user has full access to the servlet.

chgrp -R /opt/tomcat
chown -R /opt/tomcat

You should double check the file attributes in the /opt/tomcat/bin directory. All of the *.sh files should be set executable. If not run the following command:

chmod +x /opt/tomcat/bin

Create the Service Wrapper

Creating a service wrapper allows for systemctl to start / stop / restart the tomcat servlet. Create the file tomcat.service in the /etc/systemd/system/ directory. Copy and paste the following code:

[Unit]
Description=Apache Tomcat 8 Service
After=syslog.target network.target

[Service]
Type=forking

User=tomcat
Group=tomcat

Environment=JAVA_HOME=/usr/lib/jvm/jre
Environment=CATALINA_PID=/opt/tomcat/temp/tomcat.pid
Environment=CATALINA_HOME=/opt/tomcat
Environment=CATALINA_BASE=/opt/tomcat
Environment='CATALINA_OPTS=-Xms512M -Xmx1024M -XX:MaxPermSize=192m -server -XX:+UseParallelGC'
Environment='JAVA_OPTS=-Djava.awt.headless=true -Djava.security.egd=file:/dev/./urandom'

ExecStart=/opt/tomcat/bin/startup.sh
ExecStop=/bin/kill -15 $MAINPID

[Install]
WantedBy=multi-user.target

After saving the file, run the following commands to start the tomcat service:

systemctl daemon-reload
systemctl start tomcat.service

To have the tomcat service start on boot up remember to enable it:

systemctl enable tomcat.service

Configure Xwiki

Copy the xwiki-platform-distribution-war-13.8.war file to /opt/tomcat/webapps/xwiki.war. Restart the tomcat service.

systemctl restart tomcat.service

Copy the mariadb JDBC driver jar file into the Xwiki library folder. The folder should be /opt/tomcat/webapps/xwiki/WEB-INF/lib/. I found the mariadb driver their downloads page. I used the most current stable version, which at this writing is version 2.7.3,

Edit the hibernate.cfg.xml file that is located in xwiki/WEB-INF directory. This file provides the connection strings to the database we created earlier. Make sure to comment out the hsqldb section. By default Xwiki comes with this section enabled. I provided the section to comment out:

    <!--
    <property name="hibernate.connection.url">jdbc:hsqldb:file:${environment.permanentDirectory}/database/xwiki_db;shutdown=true</property>
    <property name="hibernate.connection.username">sa</property>
    <property name="hibernate.connection.password"></property>
    <property name="hibernate.connection.driver_class">org.hsqldb.jdbcDriver</property>

    <property name="hibernate.connection.charSet">UTF-8</property>
    <property name="hibernate.connection.useUnicode">true</property>
    <property name="hibernate.connection.characterEncoding">utf8</property>

    <mapping resource="xwiki.hbm.xml"/>
    <mapping resource="feeds.hbm.xml"/>
    <mapping resource="instance.hbm.xml"/>
    <mapping resource="notification-filter-preferences.hbm.xml"/>
    <mapping resource="mailsender.hbm.xml"/>
    -->

Then uncomment the mariadb section. Update the user name and password that your created when setting up the database.

    <!-- MariaDB configuration.
         Uncomment if you want to use MariaDB and comment out other database configurations.
         Notes:
           - if you want the main wiki database to be different than "xwiki"
             you will also have to set the property xwiki.db in xwiki.cfg file
    -->
    <property name="hibernate.connection.url">jdbc:mariadb://localhost/xwiki?useSSL=false</property>
    <property name="hibernate.connection.username">xwiki</property>
    <property name="hibernate.connection.password">xwiki</property>
    <property name="hibernate.connection.driver_class">org.mariadb.jdbc.Driver</property>
    <property name="hibernate.dbcp.poolPreparedStatements">true</property>
    <property name="hibernate.dbcp.maxOpenPreparedStatements">20</property>

    <property name="hibernate.connection.charSet">UTF-8</property>
    <property name="hibernate.connection.useUnicode">true</property>
    <property name="hibernate.connection.characterEncoding">utf8</property>

    <mapping resource="xwiki.hbm.xml"/>
    <mapping resource="feeds.hbm.xml"/>
    <mapping resource="instance.hbm.xml"/>
    <mapping resource="notification-filter-preferences.hbm.xml"/>
    <mapping resource="mailsender.hbm.xml"/>

Create Permanent Directory

Xwiki needs a directory for storing attachments and other files. You want these files to be out side of the Xwiki application area. I use /var/lib/xwiki/data for this storage. I then set the owner and group to the tomcat user/group.

chgrp -R tomcat xwiki
chown -R tomcat xwiki

In the /opt/tomcat/webapps/xwiki/WEB-INF directory modify the xwiki.properties file. uncomment the environment.permanentDirectory and make it point to the correct location you have chosen.

Your Ready to Access Xwiki!

XWiki runs on port 8080. To access your XWiki installation open your web browser and type: http://yourdomain_or_ip_address:8080/xwiki

The first time launching Xwiki., the setup script will run. The tables in the database will be created and you’ll setup amoungst other things, the administrator id and password.

Categories
3D Printing

Tools for 3D Printing

I’ve compiled a useful set of tools that are a must for 3D printing.

Starting on the left, the typical pliers, cutters and needle nose pliers are a must. I use them to cut a fresh edge on filament and to help remove pieces of excess plastic from the print.

The yellow handled tools are a set of picks that I bought from Harbor Freight. The set actually has 4 different picks even though only 2 are shown here. I use all 4 picks to remove support plastic and rafts.

On the right are Artist painting knives. I bought these at Micheal’s. The painting knives have a nice small edge to get under the print to separate it from the print bed.

Categories
3D Printing

3D Printing

My son, MJ, bought a 3D printer about 6 years ago. He used the printer up at college and for a year or so afterwards. Recently, as he was moving into a new apartment, the printer found its way back to the house. With the printer being readily available, I couldn’t resist but to start using the machine. The printer was one of the first models Qidi Tech offered to the consumer. Even though it is over 6 years old, the printer is still very competitive with current models.

There are two major types of 3D printers available to the home user at a price point that is reasonably affordable. Fused disposition modeling (FDM) is the process where thin layers of filament plastic are laid down on the build plate. That is the process this printer utilizes. The other major type of home printer is stereolithography apparatus (SLA). SLA uses a laser to cure the resin to form the print.

The printer is capable of using ABS or PLA filament. ABS is supposed to be more finicky getting the print settings figured out. In practice I have found ABS to be easier to work with.

The printer came with 0.4mm nozzles. MJ never plated around with changing the nozzles. Of course I had to swap out the nozzles just to see if we could improve the quality.

One of the first things to print are temperature towers. The towers are designed to find the best temperature for the filament you are using. There are numerous variables that influence the temperature settings. The type of filament, ABS or PLA, the manufacturer and the color of the plastic all impact the best temperature setting. As an example on how the temperature can vary, I’ve been using ABS filament from Sunlu. I have 5 spools of filament that are identical except for the color. I have founds the white ABS prints best at 210C, where as the gray ABS prints best at 215C.

In experimenting with the printer I have come to the conclusion that 3D printing is more of an art form to get good results. Once you get comfortable with the specific filament and understand the slicing program you are using, a home hobbyist can get semi-professional results.

Categories
BBQ Family

Barbecue Rebuild (We’re talking major surgery)

We bought our current barbecue about 5 years ago.  Within a few weeks after purchasing the grill, the propane regulator failed in the open position.  Basically the propane free flowed and the grill reached a temperature of about 700 degrees.  The knobs and control valves all melted.  Cathy called up Charbroil.  Of course they claimed we didn’t clean the grill and it was grease that burned.  Cathy did not let them off the hook.  She called in multiple times.  Finally one of the customer service reps sent us the parts to rebuild the grill.

Over the course of two or three weeks we received three different boxes of parts for the grill.  My guess is each customer service rep she contacted went and sent the parts without telling her.  We had enough parts to build the grill twice over.  So I took the parts I needed to rebuilt our new grill.  I took all the remaining parts and stored them in the shed on one of the shelves.

After 5 years of a lot of use, the grill is in very sad shape.  The grates are all rusty.  The burners and covers are crumbling.  The grease pan is coming apart.  Time to pull the plug.  Not!  It’s time to pull out all the extra parts Charbroil sent us.

With all the parts I had available, I was able to rebuild the entire grill.  New burners, covers, grates.  New lid.  New valves, knobs and propane regulator.  I had to purchase a new thermostat that attached to the top of the lid.  Cathy was able to order a new grease pan for just under $20.00.  The cabinet is really the only part I had to re-use.  With luck the grill is good to go for another 5 years.

Categories
Blog Family

Annual Pumpkin Carving Contest

The annual Petersen pumpkin carving contest was again a complete success.  We had four entries this year.  Mom was supposed to be an impartial judge, so of course she declared everyone a winner. SMH.

Categories
Family

MJ Graduated RPI

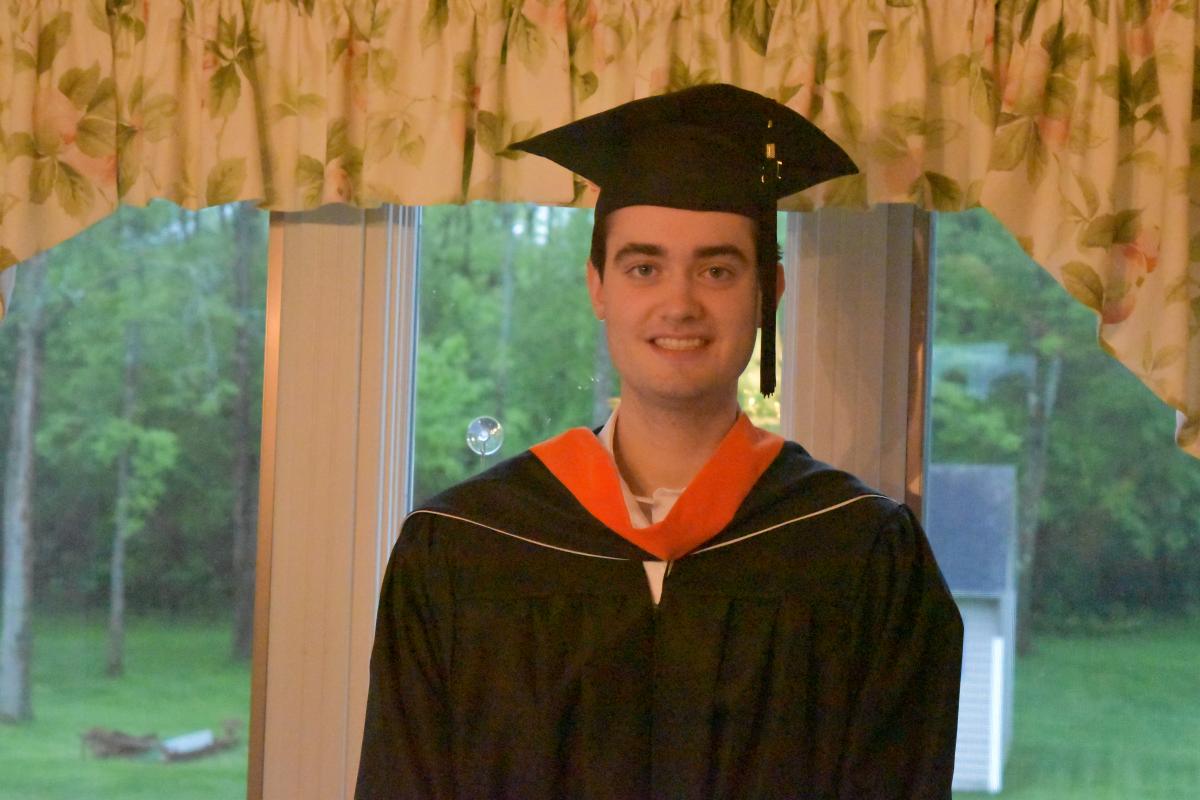
MJ graduated from RPI!  He completed both the mechanical engineering and aeronautical engineering degrees in December.  Three and a half years for 2 Bachelor degrees.

In May he walked in the graduation ceremony.  (Mom made him!!)   Actually I think he was afraid to face mom’s wrath if he didn’t go to the ceremony.

Over the years MJ has stayed close friends with his freshman year roommate, Bobbie.  It was really nice to see both of them graduate together.


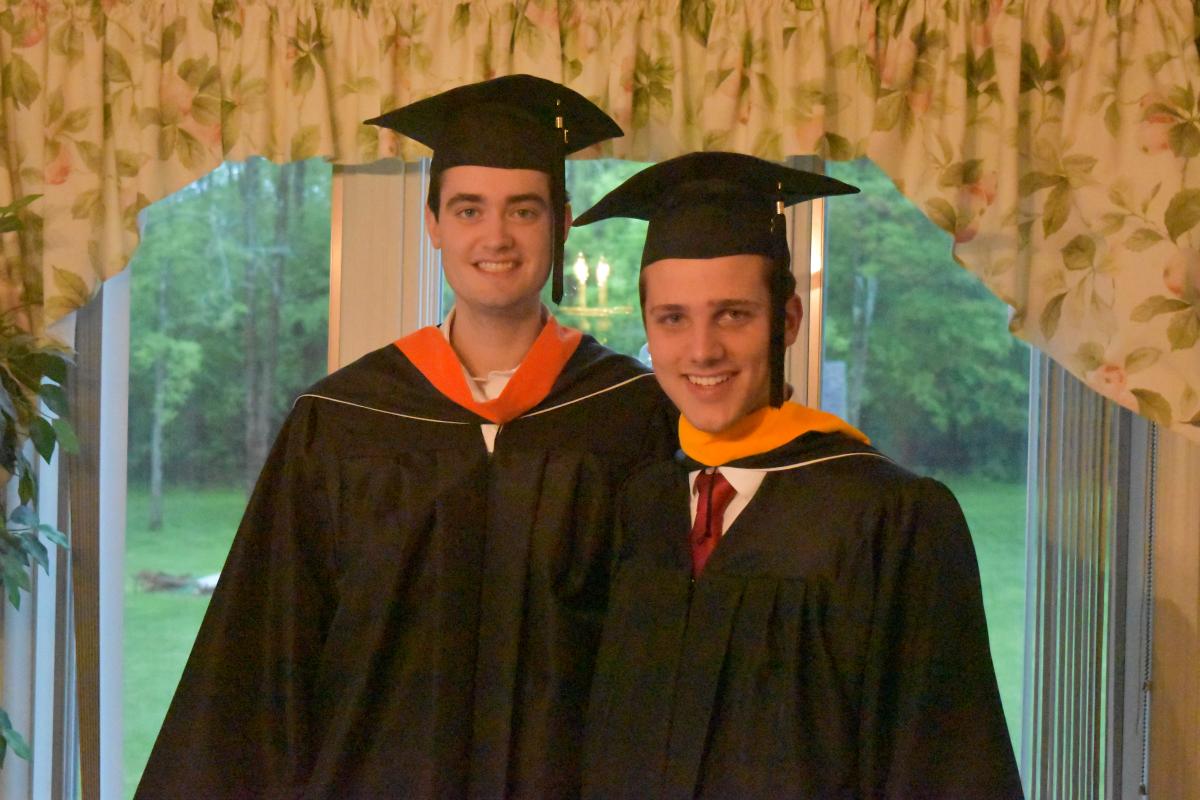
The weather for graduation was a bit dreary and 1/2 way through the ceremony it started to rain.  Nothing empties out a stadium faster than cold dreary rain.

Putting aside the weather, it was nice to mark the completion of his undergrad career!  And mark the end of those awful payments to RPI every semester!


Categories
Blog Family

We have a new driver in the family

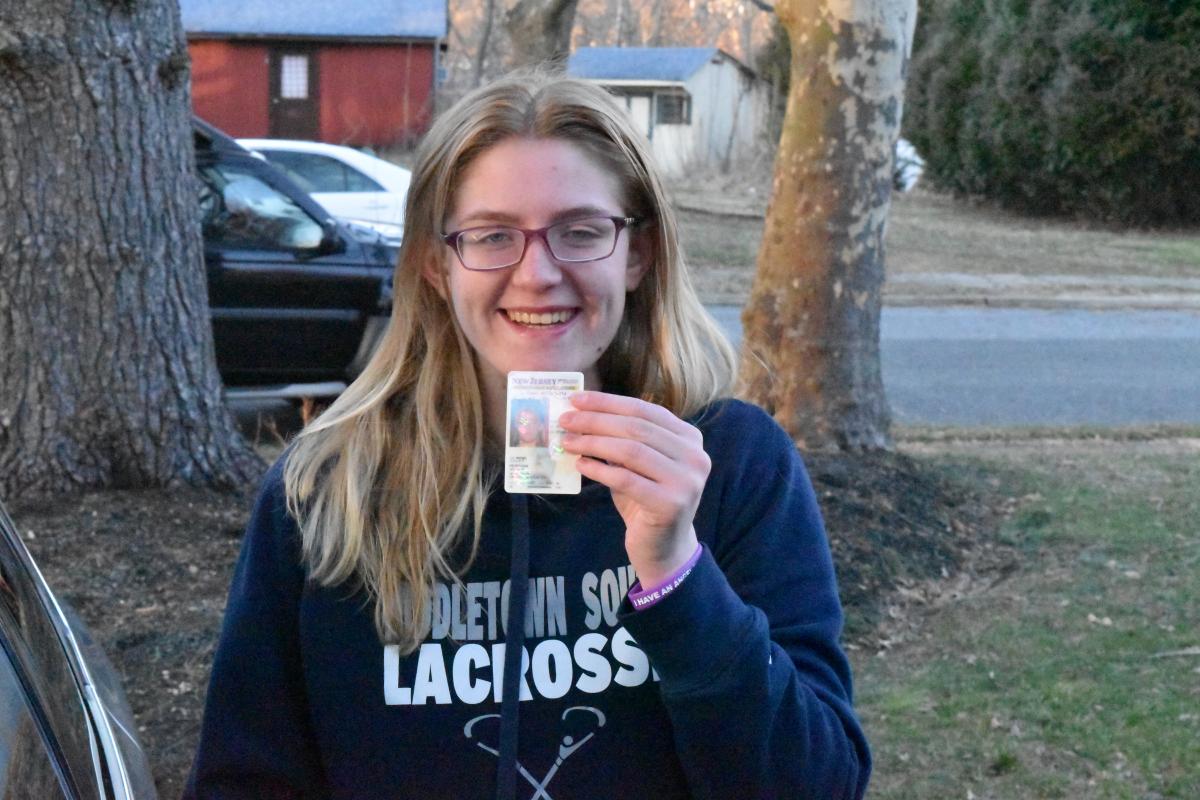
Jill got her drivers license!

That night we went out to Robinson’s Ale House in Red Bank to celebrate.  MJ and Thea were able to join us.  We all piled into either Jill’s car or MJ’s.  It was weird that neither Cathy or I was driving.

We bought a VW Passat for Jill to  drive on a regular basis.  All of our cars are on the larger size, a Nissan Pathfinder and a Chevy Silverado, and it was not fair for her to have to learn on the bigger cars. But she did it.

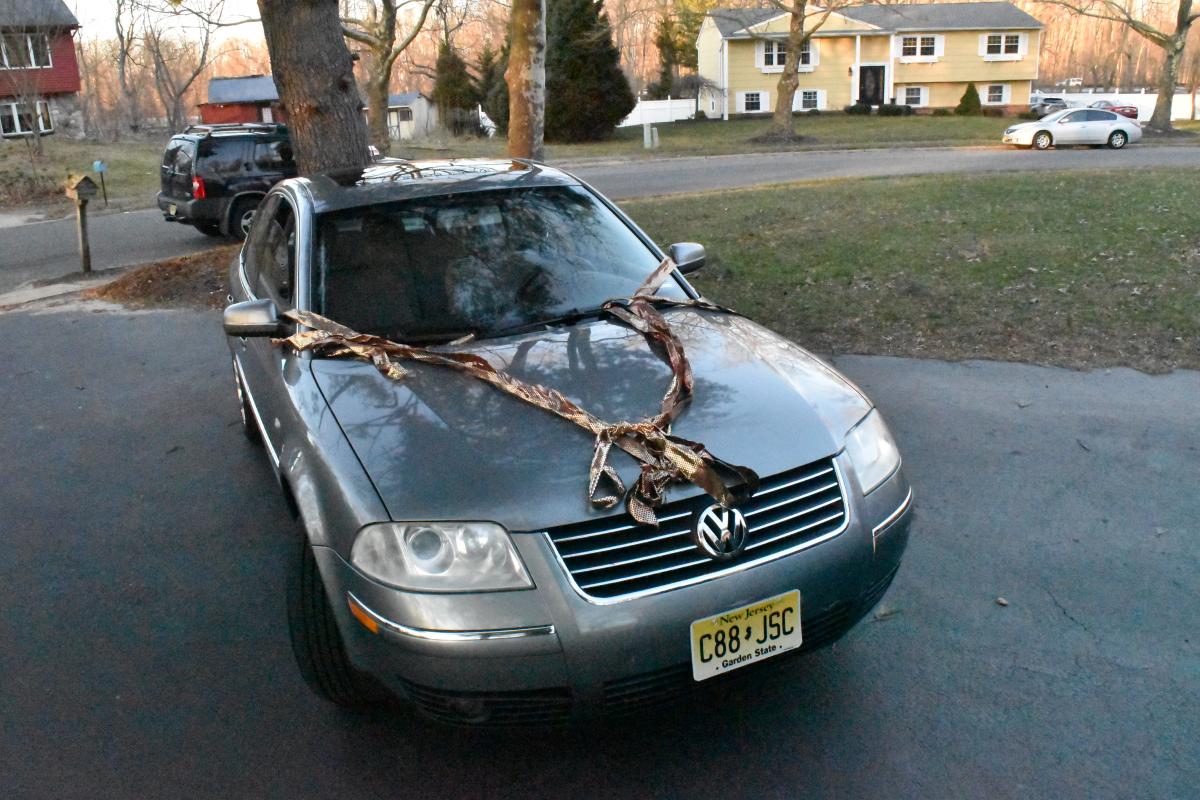
While we were at the restaurant, Jill asked if she could drive home alone.  It would be the first time she as in a car all by herself with no one overseeing.  Cathy looked at me with her “Oh my….??” look.  Before Cathy could object, I said yes.

Jill was giddy with excitement and left the restaurant ahead of us.

As we were walking down the street, I looked up to see the Passat coming up the street.  I pointed to the car and said to everyone “Here comes Jill”.  We stood there in silence as we watched her drive off, heading home.  MJ turned to me and said “That has to be the most terrifying site”.  I said to him, “Not really, the most terrifying site was watching you drive off  for the first time. Second time around is not so bad.”  MJ clearly did not see the humor in that statement.


Categories
Blog Family

Stromboli Night

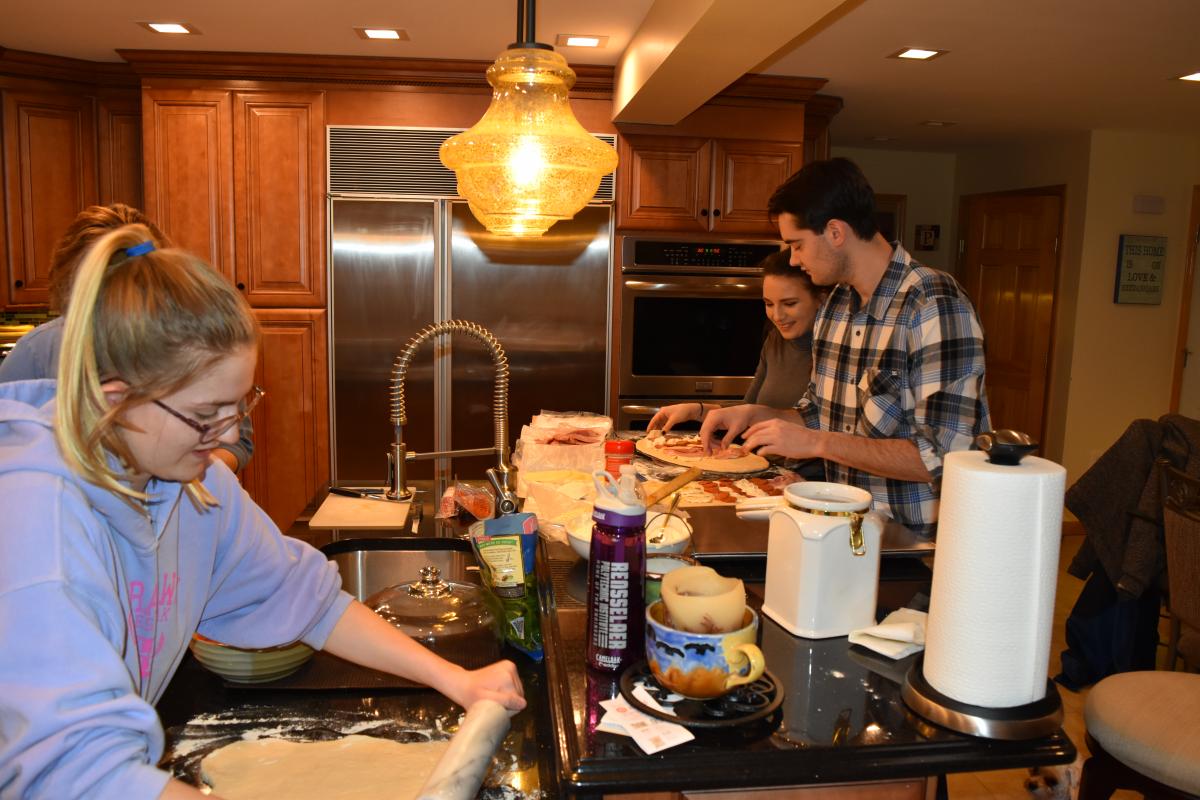
Mom decided to break in her new kitchen with Stromboli night!

This was a truly unbelievable event in our household.

In the old kitchen layout only 1, maybe 2 people could work in the space at a time.  There was very limited counter space and no matter how careful, you were always bumping into the other person.  With the new kitchen layout we had 5 people all doing something!

On top of that, Mom allowed the kids to throw flour all over the granite counter-tops so we could roll out the dough for our Stromboli’s.  Each of us made up our own personalized Stromboli with whatever we wanted as a filler.

Through it all Mom kept a smile on her face.  Flour was all over the counter-tops, some of the flour and fixings spilled on to the floor, the sink was full of dishes.  Yet she smiled.


Seriously, I was starting to think the pod people replaced my wife!

At the end, the Stromboli’s came out perfect!

WP2Social Auto Publish Powered By : XYZScripts.com